Showing posts with label quilt. Show all posts

Wednesday, 20 May 2015

Baby Love

I love making Baby things and the last few years I have taken to making 
themed baby gifts for my grand- babies.

I shared a bit about this owl-themed gift HERE


Another theme idea came from a small bird design I made. 

I shared how I made the quilt   HERE    even though I am not really a very proficient quilter.


Here is a close up of one of the birds on the quilt.


The finished quilt


The crochet flannel blanket pattern can be found  HERE


Another crochet blanket made with granny squares and a ruffled edge in colors to go with the theme.


A bird pillow with two different sides.


And last but not least a small crocheted bird rattle made
 from a pattern I purchased from  THIS  etsy store.


This is the latest baby gift.


The first thing I decided to make was a crochet blanket. 
Since it needed to be neutral until I knew the gender of the baby I decided to
use a white and grey color scheme. The black edge was a later decision.

This free pattern can be found HERE

I added a border and sewed the pink ribbon on by hand at the end to add a
 feminine touch after finding out my new grand-baby was a girl.


This baby gift theme started with an idea to use farm animals. I decided to continue
 the grey, black and white after liking how the crochet blanket looked

First I purchased a horse, cow and chick embroidery pattern
 HERE  to use as appliqué patterns.

I purchased the pattern for the lamb  HERE.

The pig I designed myself with the Pages app.

These patterns:


Became this:


And then: my final blanket top design:


I sent my design to Spoonflower and had it printed in an organic
knit cotton that is extremely soft.


I put a white layer of flannel between the quilt top and a soft striped flannel
I found for the backing. It makes the blanket a very nice weight.


The dotted lines were a great guide for hand stitching around each square.
Decorative pink stitching was added as with the other pink touches at the end.

The decorative lamb pillow is made with polka dot flannelette, white and black felt.
It could be used as wall decor instead of a pillow. It is quite flat.

Even the pink bow is made of felt. 


A sweater is always nice gift. I crocheted a simple shape all half-double crochet with a few
stripes. I was planning to make the sweater hooded but changed my mind and made a
shell stitch peter-pan collar. When it was finished I got the idea to line it with some soft
cotton fabric and from there it seemed sensible to make it reversible. I cut two pieces of the
lining fabric the same shape as my sweater and seamed it right sides together. Then I
sewed it by hand into the sweater. I like how it turned out and so did my daughter-in -law.
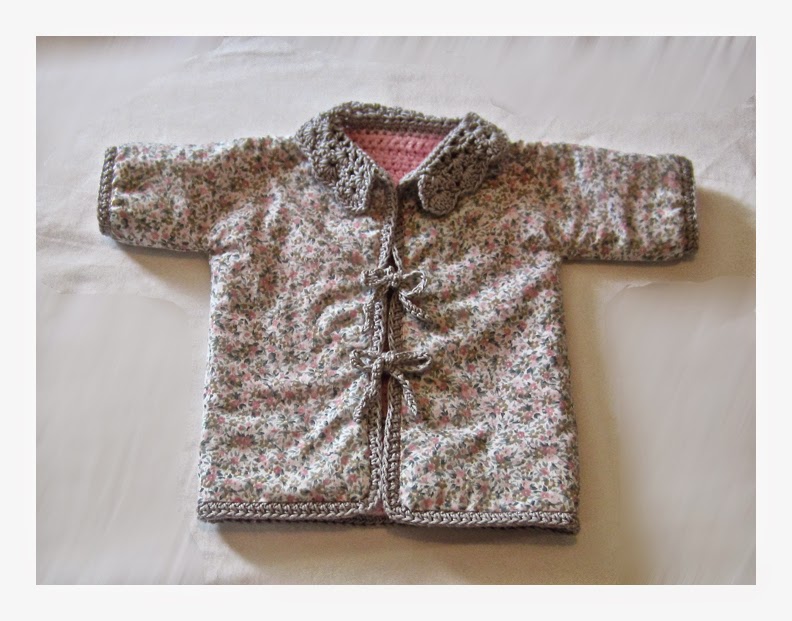


Ties seemed to work the best for a reversible sweater. They are a crocheted chain and then slip stitched into each chain for body.


At the last minute I found I had some flannelette in my stash  that had sheep on it so decided to make a double-sided blanket to line the basket I was putting my gift in.


Finished Baby gift !
A baby is a wonderful miracle and so much fun to make things for. What do you think?

Thursday, 29 August 2013

I am not a quilter!

I am definitely not a quilter!  This quilt is a trial and error effort.
 I made it after reading quite a few tutorials about quilting methods.
 It is definitely not perfect but I am not unhappy with how it turned out.
  If I can do this anyone can!

Bird theme baby gift collection
I wanted to do a bird theme gift for my newest granddaughter.
 I started by drawing a simple bird.


 My Plan

I uploaded fabric images and placed them in a "pages" document to 
get an idea of how I wanted the top of my blanket to look.

        Top fabrics                                           Main backing fabric
The top fabrics are all 100% cotton with a flannel print in each color for
 softness and texture. The main backing fabric was chosen for 
color and the small birds in the pattern

Because I decided to finish my blocks totally before joining this 
wasn't the only backing fabric but it still was the main one.

This is my batting.

I decided to try this Quilt as you go method of making my quilt. I also decided to finish each block (front and back) and then join them (not sure I will do this again). Just one large backing piece would have been so much easier.

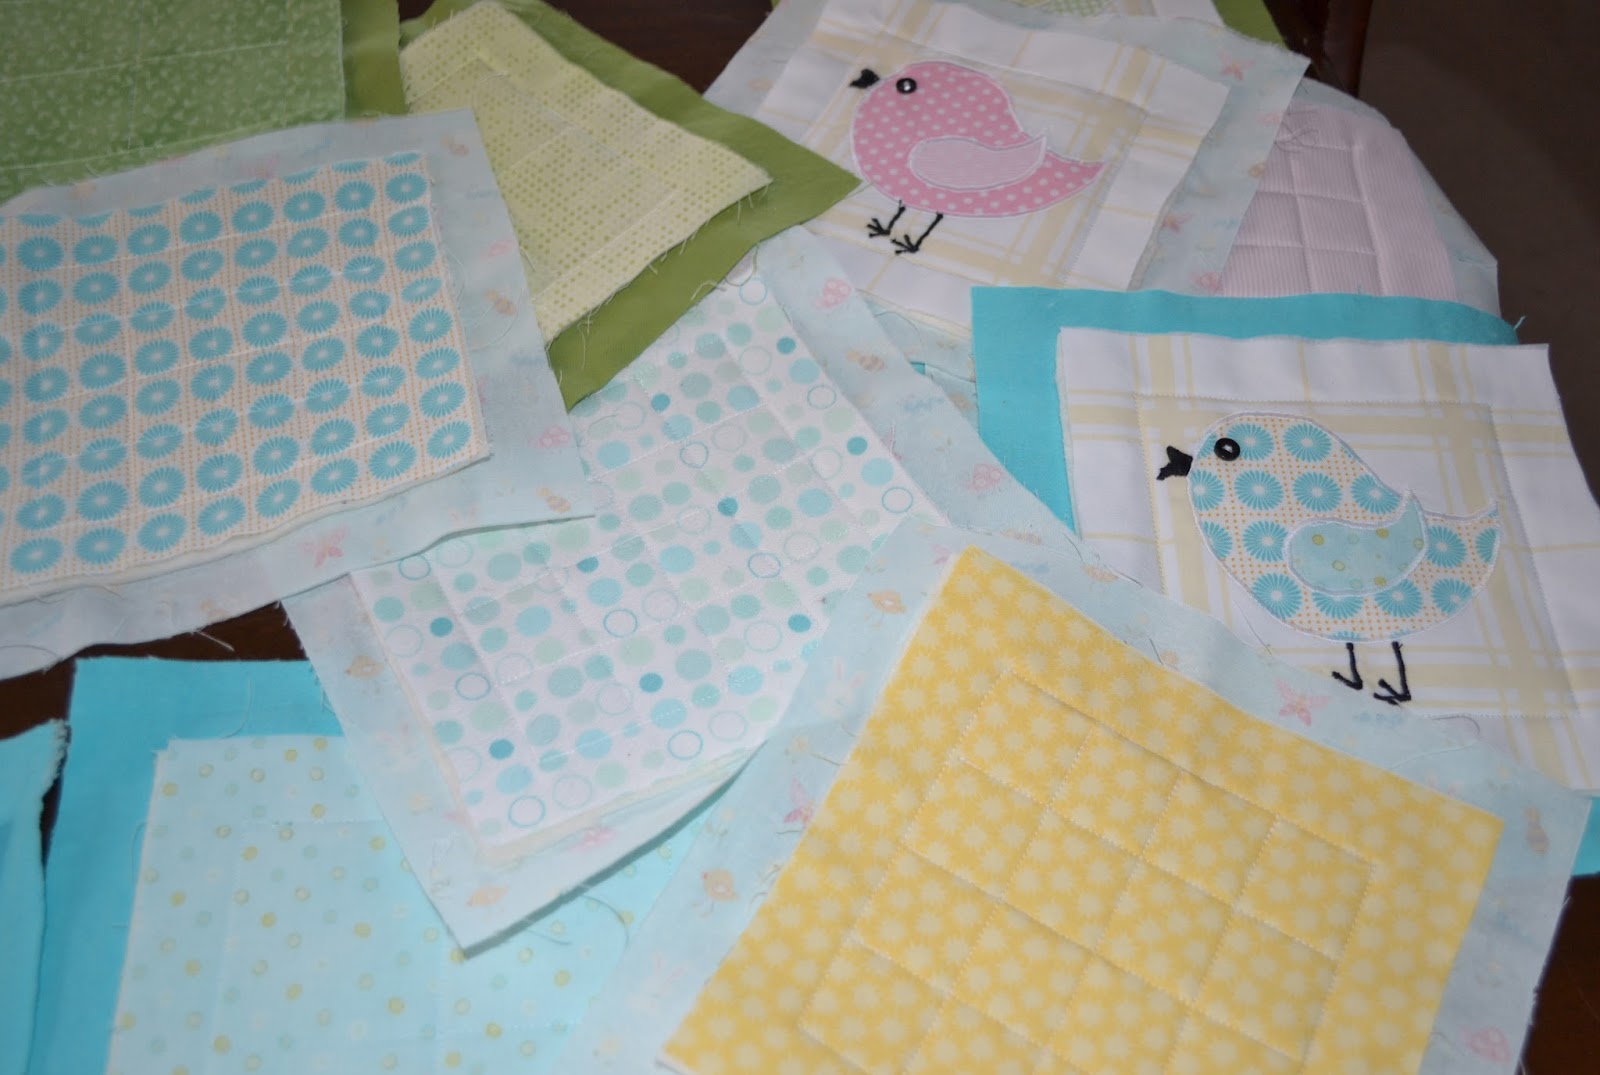
First I cut out all my fabric squares. You can make yours whatever size you want. I made mine 7"x7". Using ½" seams the end result is 6" squares.


I used a very light colored fabric from my stash for the squares that 
would have the appliqué on them.

Cut your backing squares at least 2" larger than your top ones. I made mine 9". Four of the rows were plain fabrics using the four colors and the alternate rows were my main backing fabric creating wide stripes.

Press, press, press. To keep everything neat and flat! It is a good idea to stabilize the fabric for your appliqué squares with iron on lightweight interfacing.


Preparing the Appliqué


Print the bird template on freezer paper (you can adjust the size before printing to fit whatever size square you are using)Make sure to print on the dull side. Iron the print shiny side down onto the right side of your fabric. Do the same for the rest of the birds. Cut out the bird shapes. The freezer paper peels right off. If this doesn't make sense check out tutorials by searching: using freezer paper for appliqué. 


Cut the beaks out of felt and iron on using the "heatn'bond"

The birds

Use a very tight zig-zag stitch to sew around the birds and to make the feet (following the template). I also zig-zagged over the beak to make it more sturdy. Sew on (very securely) a small button for the eye.
If you prefer you could make an eye with embroidery.

Quilting the Squares

Sandwich a piece of batting the same size as the top square between it and the backing fabric.


Sew straight lines 1" from the edge around the square to create an inner square.Tip: I used a small square of paper for my corners to know when to stop sewing before turning and a piece of masking tape on my machine to keep a straight line with my backing fabric

for the squares with the solid backing I just divided the inner 
squares with two lines. 

I have highlighted the sewing lines so you can see what I did.

Sew a simple line making a square around the birds 1" from
 the edge on the appliquéd squares.

For the squares with the main backing I divided the
 inner square into sixteen even squares.

Quilted square back
You can do a different quilting pattern. 
This one is very simple for non-quilters like me.

quilted squares
        
Putting it Together

 I am missing a few photos here so I hope I can explain what I did.

Pin the backing fabric out of the way and sew the top of the squares right sides together into rows using a ½" seam. Refer to the "quilt as you go" tutorial linked to earlier. It is very helpful.


Lay out the rows in order the way you want your quilt to look.
The plan I had printed helped me with this.

Sew the fronts of each row together the same way you did the squares.

Sew the backs together following this tutorial. Sorry I have no photos of the process. I found it somewhat difficult and as a result I wasn't able to focus on photos. The tutorial is good. I also didn't do the hand sewing instead I folded the back edges of the squares under and sewed "in the ditch" around the front squares to finish as I was under time constraints. Hand sewing would no doubt look neater. 

colors on the back

The Border

                                      
I wanted a patchwork binding but you can bind the blanket any way you like. There are lots of tutorials about how to do this.

Here's how to do it the way I did:

Cut fabric pieces 7" long by 3" wide.


Fold fabric pieces in half lengthwise and press.


Lay out your border pieces to see how it will look 
before you sew them together.

Place the border strips unfolded right sides together on the top of the blanket. Sew the top layers together as you did for the squares. Be sure to line up the rows evenly. 

To make mitered corners follow this tutorial.


Fold over ½" on the back of the border and sew down covering the raw edge on the back and matching the border seam on the front. I would
suggest reading a few tutorials on blanket binding.

Finished baby quilt


I must admit I like this picture of the quilt best of all!

I apologize for the parts of this tutorial that don't have photos. I hope 
you will find better instructions online where mine have failed to be clear.
I will try to answer any questions if something doesn't make sense. 
Writing tutorials is not my strong suit.

Good luck with your baby blankets!